Tuesday, February 26, 2013

Easy Pantry Storage

Is your pantry too small?
Do you need more storage?


Purchase an over-the-door organizer and hang it on your pantry door for and inexpensive storage option.  The plastic pockets are great for storing snacks!


Thursday, November 1, 2012

All That Leftover Candy!!!

Have leftover Halloween candy calling your name?  I like to keep a reasonable amount for the kids to enjoy, and then, take the remaining chocolate bars and make cookies with them.  Simply put the chocolate candy bars (all of them...Snickers, 3 Musketeers, Mounds, Whoppers, Reese's Peanut Butter Cups) in the freezer.  When they are frozen, remove the wrappers and either chop them up or pulse them all together in a food processor.  Then make the cookie recipe below and use the chopped candy bars as a substitute for the chocolate chips.  You can ball and freeze the dough and then just bake as you need them.  A DELICIOUS way to use up those small size bars!


For the ultimate chocolate chip cookie recipe, click here!

Friday, October 26, 2012

Peppermint Patty Cake

My eldest daughter turned double digits this October.  I can't understand where the time has gone.  Her favorite food is the Homemade Peppermint Patties that I make, usually around Christmas time.  (Click here to see our "stocked" recipe!)  I decided to take the Peppermint Patty filling and use it as the filling in her layered chocolate cake.  One recipe of the filling was just about perfect to layer into a 9" cake.  It was DELICIOUS! 

I always try to sift in the powdered sugar into any recipe I am making.  It always turns out better without lumps!
After the cream cheese, sugar, and peppermint extract are mixed well, I sprayed a 9" pan with Pam and pressed in the mixture to match the shape of the cake.
I layered the mixture onto the bottom layer of cake and then trimmed off the edges.
I topped it with the other 9" layer of cake and frosted the whole thing with a boiled chocolate frosting.  YUM!
It was all about the peace signs and zebra print this year.  The zebra print came courtesy of Wilton's Sugar Sheets.  Super easy to use, tasty, and really cute.  Happy Birthday Lexie!

Tuesday, October 23, 2012

Everything has a place!

So people often ask me, "Are you constantly cleaning?" I guess it is because my house always appears guest ready.  Well the truth is that I don't really "clean" (bathroom's, floors, dusting) as often as I should.  My home only appears clean because everything has a place!  We put things away as we go so it never builds up to become a big, overwhelming task. 

Here are a few easy tips for keeping things in their place!
  • MAIL - Instead of dropping mail off at the dining room table or kitchen counter, try going through the junk mail as your walking into the house.  Immediately discard junk mail and save only the important stuff.  Make sure you have a convenient spot (box, file drawer, desk) to drop off the relevant mail until you have time to go through it.
  • DISHES - Don't let your dishes pile up in the sink!  Teach your kids (and husband) to immediately rinse off the dirty dishes and put them in the dishwasher.  I run the dishwasher every night before bed and then unload as I am getting my kids breakfast the next morning.  This way dirty dishes are never lying around the counters or sink.
  • SHOES - Have a designated spot to put on, take off, and store your family's shoes everyday.  A box or basket that you don't care about works best.  On their way into the house, have the kids take off their shoes and immediately throw them in the basket.  Next time they look for a shoe it won't be as hard to find!
Remember...putting things in their place as you go is much easier than one letting them pile up for one big organization day!

Tuesday, October 16, 2012

Halloween decoration storage.

I love Halloween!  I love to decorate my home with scary skulls, fun ghosts, and batty bats this time of year.  I even decorate my kitchen! 

Make storing and finding those creepy Halloween decorations easy by placing them in an orange (or black) bin in your storage room.  They stack, will be easy to find every October, and the plastic will protect them from damage.  I actually have three orange bins for all my items.  Like I said...I love Halloween! 


This bin is $13.00 on Space Savers, but if you wait 3 more weeks, they will most likely be on sale at your local store.  Go out and buy one, or two, or three!

I also store my Easter decor in a purple bin and my Christmas decor in red bins.  Just in case you plan ahead!

http://www.spacesavers.com/Storage/Halloween-Storage-Totes/Sterilite-66-Quart-Orange-Black-Latch-Box-Great-for-Fall-Storage

Thursday, October 11, 2012

Toasted Nuts


Using toasted nuts in recipes makes a tremendous difference.  By cooking the nuts, their natural oils are released and the flavor is increased dramatically.  Don’t be intimidated by the process.  There are several ways to do it, and the only really crucial part is that you keep an eye on them, because they can go from perfect to burnt in a blink of an eye.

STOVE TOP:  Heat nuts in a dry fry pan over medium until they are golden brown.

OVEN:  Preheat oven to 350 degrees.  On a parchment paper covered jelly roll pan, heat nuts for about 10 minutes or until golden brown.

The best indicator of the nuts being done is by smell.  Once you start to catch a whiff of that toasted deliciousness, they are just about done!  Enjoy!

Monday, October 8, 2012

Junk drawer organization!

So we all have them somewhere in our kitchen...those annoying junk drawers that are impossible to organize.  Not any more! 

Check out this great idea from Real Simple.  Use drawer dividers to separate your junk drawer "odds and ends" into categories.  You can purchase wood, plastic, or metal dividers and just fit them together like a puzzle depending on your drawer size.  If you don't want to spend the money, then use the top of shoe boxes. 

Genius!!


Thursday, October 4, 2012

Know thy Knife!

Over the last 5 years, much of my own increased confidence in the kitchen has come, undoubtedly,  from the implemented strategies of The Stocked Kitchen.  I have also realized, however, that my knife skills are much more on point, most likely from the sheer enormity of recent cooking, but also, from sneaking peeks at every good cook around me.  The reason I think that these knife skills have actually improved my cooking ability, is because of the time savings it has provided.  Chopping, dicing, and mincing can be a daunting task, if you don't have proper and speedy techniques. I stumbled across the web series below on proper knife techniques.  I have embedded the video on the professional knife grip.  This alone has helped me to have better control and safety in the kitchen.  "Perfect practice makes perfect."

My other suggestion is that out of all of the tools in your kitchen, good knives make a big difference.  And, although counter-intuitive, sharp knives are much safer.  (If sharpening your own knives seems scary, go to your local butcher and ask them to do it.)  Eric Ripert will have a different standard of knives than us mere mortals, however, there are a few qualities that a good knife collection should have.  First off, you only REALLY need three different knives for cooking.  Although those enormous blocks of knives on your counter can look incredibly impressive (and threatening) these three are the knives you can cook just about everything you want to with.  In all of these knives, a high carbon stainless steel is good quality, takes a sharp edge, and has the benefit of stain resistance.

Chef's Knife:  The big one.  I like this knife to be BIG, non-serrated, and without wooden handles.  This wooden handle bit is personal preference, although some jalapeno juice recently soaked into a wooden handled knife of mine (unbenounced to me), and although the knife had been washed, days later my poor hands were ablaze!  This knife is the one I really run to for most things, so look at it as an investment.

Paring Knife:  The little one.  This is what I use for peeling, cutting, and cleaning fruits and vegetables. In fact it is good for any use that the Chefs Knife makes you feel like a sword wielder.

Serrated Bread Knife:  This one I use the least, but when you need it, you need it.  This is for, obviously, cutting bread, but also for making multi-layer cakes and cutting through very soft tomatoes.

So get your band-aids and butterflies ready (remember that New-Skin burns like a mother) and get to it!


Here is the link to the rest of the knife skill lessons.  (I haven't reviewed them all as of yet, but the first few seemed very encouraging.)  Enjoy you beautiful people!
XOXO,
Sarah

Thursday, September 27, 2012

My two new favorite cleaning supplies!

Sometimes your new must have products are already in your home, just being used for different purposes.  My two new favorite cleaning supplies are not found in the "cleaning supply" aisle, but in the baking aisle!

Baking Soda:  I know that this has been used for a long time for many different functions, but I think it is absolutely the best value scouring product you can use.  It not only takes the crusty stuff off of pots and pans, but it works wonders on those brown stains on your glass baking ware.  Best part is, is that you use it to cook with, so it is a cleaning product without all of the toxic chemicals.  Mix with just a bit of water to make a paste and scrub away.  


Olive Oil/Vegetable Oil:  It is counter intuitive, but it completely works...the only way to really cut oil based products is to use...more oil!  So when you have that greasy grime on the tops of your cupboards, or on the edges of your stove, start by rubbing some oil on it.  It loosens the caked on stuff enough to then wash it away in a hurry.  Same goes for getting oil based paint on your hands.  Use a little olive oil, and it comes off with much less elbow grease!


Happy Cleaning (total oxymoron...but worth a shot!)  :)

Thursday, September 20, 2012

Eggs Benedict for a crowd!

I love Eggs Benedict for brunch, however the egg poaching for a crowd can seem overwhelming.  Try this great tip for "poaching" eggs in a muffin tin in your oven!  Then see below for our delicious Hollandaise Sauce recipe!

I tried this tip from carolinaheartstrings.com today, testing it before my brunch tomorrow, and it worked great.  I liked the eggs at about 8 minutes in the oven.  Also, I used a slotted spoon to get the eggs out so that the water could run off.  Be gentle though, so the bottom doesn't stay in the pan!  

MUFFIN TIN POACHED EGGS

Here’s a way to have poached eggs come out perfectly and it is ideal for when you have several to feed.  When I saw this idea I knew I wanted to do it for one of our March egg postings.
Since everyone has a muffin tin no special equipment is required!  Simply grease as many spots as eggs that you plan to cook and heat the oven to 400 degrees.  While the oven is preheating boil a small pot of water.  When the oven is ready put 2 tablespoons of boiling water into each muffin spot and crack one egg per spot into the tin.
Bake for 8-10 minutes depending on how firm you like your eggs and then remove each gently by sliding a flexible plastic spatula around the edge and lifting out.  Let water run off for a minute before putting onto your final serving plate.
I served with English muffins and breakfast sausage.  You could also serve some cheese or additional fillings for build-your-own Egg M*Muffins.
Enjoy!

Top with our...
"Stocked" Hollandaise Sauce!

  • 2 egg yolks
  • 1 T lemon juice
  • 1/4 t salt
  • 1/2 stick unsalted butter


  1. Place egg yolks, lemon juice, and salt in a blender or food processor.  Blend at top speed for 2 minutes.
  2. Melt butter in a saucepan over medium heat until foaming.
  3. With blender or food processor running, pour the hot butter in a thin stream into the egg yolk mixture.  By the time 2/3 of the butter is in the blender, the sauce will be thick.
  4. Drizzle over poached eggs and serve.
Click here to print recipe

Tuesday, September 18, 2012

One thing at a time!

Are you looking at your kitchen and feeling overwhelmed?  Every drawer and cupboard needs to be cleaned out and you just don't have a week to set aside to complete it!  Are you thinking "How can I possible get all of this organized?"

Try taking one a thing at a time!  Organize just a single drawer or cupboard today.  It doesn't all have to be done at once.  Set smaller weekly goals that you can accomplish instead of your whole kitchen as one big project.  Then once you start to see a change you will get energized and want to keep going.

Thursday, September 13, 2012

My New Favorite Kitchen Gadget!

So a dumbbell is probably not what you were guessing, but I used it last night to make paninis with great success.  This should work on a grill but I used a stove top griddle with a grill side, like the one below.

This pan is currently on sale at Kohl's for $47.49.  (Get out that 30% coupon! :) )


I used Pam on the griddle and then placed two sandwiches on the pan.  I used dry bread (not buttered) and had filled the sandwich with cold cuts, cheese, and roasted red peppers.  I then topped the sandwiches with a jelly roll pan and placed the dumbbell on top of the jelly roll pan. (The weight I used was 10 lbs.)  If the weight has a plastic coating, you may want to lay a pot holder between the jelly roll pan and the dumbbell.  The sandwiches cook quickly (2-3 minutes a side) at medium heat.  You want to see dark golden brown grill marks on the bread.  Make sure to flip half way through.  Voila!  You have a panini press made out of items that you have lots of other uses for.  You can even work on your biceps while you are cooking! :)  

Make Ahead Tip: There is nothing like a straight off the "press" panini, however, I am obsessed with making meals ahead these days.  Grill up the paninis and refrigerate.  When you are ready to eat, heat in the oven at 350 degrees for 10 - 15 minutes.

Enjoy! 

Tuesday, September 11, 2012

Dry erase TO DO list!

OK...so the kids are back in school and things are officially busy again!  Every week is filled with school, homework and activities and it can be difficult to get even the simplest projects completed.  So try making a dry erase TO DO list!

I have a TO DO list written on a magnetic dry erase board which is on my refrigerator where I see it at least 20 times every day.  I make it a general rule to never put long term task on this list because it will be impossible to get those finished, and if I can't wipe them off, I will get discouraged.  So be realistic and just write the things down that need to be finished that week.  You will start to see things get completed and you will feel better about getting them done.

This week on my list: 

Complete Photo Book for Deb
Write Grandma letter
Go to bank
Complete mending kids clothes
Order refrigerator filter

It feels good to write it down where I can be reminded to do it, but it feels even better when I get to wipe it off once it's completed!

Thursday, August 30, 2012

Toasted Bread Cups

I procrastinated yesterday about making an appetizer for a "Mom's back to school" cocktail party.  I always like to bring a bite size munchie if possible, but soon realized that I didn't have any puff pastry which usually acts as the perfect liner to stuffed mini muffin cups.  I was forced to be a bit creative, and the results were delicious!


I started with a regular loaf of bread and mini muffin tin. The bread was wheat, but not the real whole grain healthy kind. That probably wouldn't work as well! ;)


I used a juice glass and cut two holes in each slice of bread. I left the scraps of bread out overnight to dry out and pulsed them in the food processor to make bread crumbs.


Now I rolled each circle flat up and down and side to side. You should have 24 flat little pancakes.


I melted 2T of butter and mixed in 1/4t of garlic powder. I brushed each circle with butter on one side...


and pressed the circle butter side down into the mini muffin tin. I filled the cups with about 1/2 t of pesto, sprinkled with a little mozarella, and topped with 1/2 of a cherry tomato. You can fill with anything similar. We have some great filling options in The Stocked Kitchen Cookbook under puff pastry bites.


I baked them at 350 degrees F for about 12 - 15 minutes or until cheese is melted and bubbly, and the bottoms of the cups are toasted. (Sorry, I forgot to take a pic of the end result! They were yummy!)

Delicious, fun, and easy! ENJOY!

Tuesday, August 28, 2012

Make the most of drawer space!

Do you have a lot of drawers in your kitchen or maybe odd sized drawers that your not sure how to use?  Use drawer dividers to make compartments for your kitchen gadgets.  Weather deep or shallow, skinny or wide...drawer organizers are an inexpensive way to keep cutlery, gadgets, and tools neatly separated, so you never have to rummage around for what you need.

Tuesday, August 21, 2012

The Cookbook Wall!

I love to collect cookbooks!  However I am running out of storage storage space in my kitchen cabinets for these beautiful hardcover books.  Why not display your colorful collections on a cookbook wall in your kitchen?  Just purchase some ledges, short or long, and hang them in your kitchen.  This is an easy way to store your cookbooks and to decorate a lonely wall at the same time. 

Oh...and don't forget to display The Stocked Kitchen cookbook!

Friday, August 17, 2012

Tomatoes Tomatoes Everywhere!


Tomatoes are abundant right now, and if you are growing your own or are a member of a CSA you may be a little overwhelmed. Here is a recipe for a delicious side dish that will be a great addition to your tomato recipes!

Enjoy!


Tomato Provencal

  • 4 tomatoes
  • 3/4 C bread crumbs
  • 2 green onions, minced
  • 1/4 C fresh basil. minced
  • 2 t herbes de Provence
  • 2 cloves garlic, minced
  • 1 t salt
  • 1/4 t pepper
  • 1/2 C Parmesan cheese
  • 2 T olive oil


  1. Preheat oven to 400 degrees F.
  2. Spray a 9x13 baking dish with non-stick spray.
  3. Remove stem ends from tomatoes and cut them in half crosswise. Gently core interior with a spoon.
  4. Lay end down in baking dish.
  5. Mix together bread crumbs, green onions, basil, herbes de Provence, garlic, salt, pepper, and Parmesan cheese.
  6. Fill tomato halves evenly with mixture. Drizzle with olive oil over tops of tomatoes.
  7. Bake for 15 - 20 or until tomatoes are softened and browned on top.

Click here to print recipe.


Also, this is a great technique for using fresh tomatoes in recipes like marinara sauce. It is simple, works great, and adds a freshness to your favorite sauces.


Step 1 - Removing the tomato skins

Here's a trick you may not know: put the tomatoes, a few at a time in a large pot of boiling water for no more than 1 minute (30 - 45 seconds is usually enough)


then....


Plunge them into a waiting bowl of ice water.

This makes the skins slide right off of the tomatoes! If you leave the skins in, they become tough and chewy in the sauce, not very pleasant.


Step 2 - Removing the skins, bruises and tough parts

The skins should practically slide off the tomatoes. Then you can cut the tomatoes in quarters and remove the tough part around the stem and any bruised or soft parts.

Why remove the skins? They become tough when you cook them! Some people use a juicer and then cook the resultant juice down. It takes more time, but there's nothing wrong with that approach.


Step 3 - Removing seeds and water

After you have peeled the skins off the tomatoes, cut the tomatoes in half. Now we need to remove the seeds and excess water.


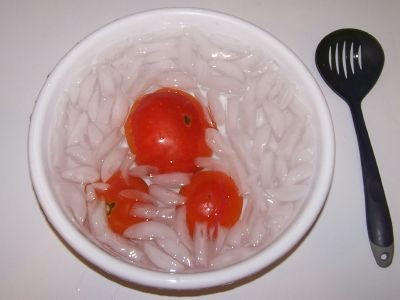
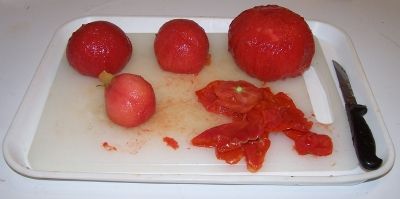
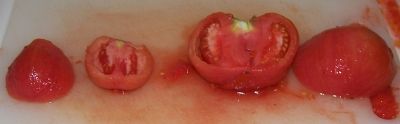
Step 4 - Squeeze of the seeds and water

Just like it sounds: wash your hands then squeeze each tomato and use your finger or a spoon to scoop and shake out most of the seeds. You don't need to get fanatical about it; removing just most will do. Another way to do it is to cut each tomato in half, across it, instead of lengthwise. Then just shake the seeds and juice out.


Step 5 - Chop or puree.

With a knife or food processor, either dice up the tomatoes or puree in the processor. Use as a substitution for diced tomatoes in your favorite recipes.
Thanks for the tips and photos from Pickyourown.org!Enjoy!

Tuesday, August 14, 2012

Small kitchen? Try hanging your pots!

If you have a small kitchen, the good news is their are great products out on the market now that can help you to organize in style.  One of my favorites is a Hanging Pot Rack.  They come in all shapes and sizes and not only can they open up more cupboard space, but they look great too.  Warming up and accessorizing a potentially dull space.


Friday, August 10, 2012

Baking Bacon...

From day one, we have loved this tip for baking bacon.  The trick is to have a jelly roll pan, a cooling rack that fits inside of the jelly roll pan, and some aluminum foil.  Line the jelly roll pan with some aluminum foil and stack the cooling rack on top.  The beauty of this for bacon is that you can cook almost a whole pound at one time, you don't have the horrifying grease splatter all over your stove top and forearms, and there isn't the day long bacon aroma imprinted into your home.  (Bake at 425F for 20 minutes or until crisp!)


Below is a set that is just what we are talking about.


Chicago Metallic Two Nonstick Jelly Roll Pans with Cooling Grid - $30.95


Besides the bacon uses, these are the most used pans in my home.  I cover the jelly roll pans with parchment paper to bake everything from cookies to french fries.  The cooling grid is a stand alone lifesaver for not only cooling cookies but also providing extra layers in your cooler or refrigerator.  Last but not least, the baking bacon method can also be used to keep meatballs out of the little ectoplasm puddles that they create as the grease is rendered.    Enjoy!


Tuesday, August 7, 2012

Organize under the sink!

The space under your kitchen sink can be a great place for storing your kitchen cleaning supplies, dish soaps, trash cans, and other items you use to keep your kitchen running.  All too often this area becomes cluttered with things that don't need to be there.  So let's clean it out!

Start by relocating any items that are not used EVERYDAY in the kitchen.  Large, bulk, or overflow soaps and supplies should be stored elsewhere in the house, basement, or garage.  Then use plastic baskets or install a slide out shelf to hold the remaining kitchen cleaning supplies and dish soaps.  A bucket with a handle or a plastic caddy with separate compartments might be your thing as it is a quick grab and go.  Which ever you choose, make sure they are water and rust proof bins!

Thursday, August 2, 2012

Homemade Elephant Ears

Summer just isn't summer without the annual carnival.  (In Grand Haven, MI it is our Coast Guard Fest which is currently captivating our little town.)  Even though summer is speeding toward back to school time, it doesn't mean that you have to say goodbye to carnival treats, namely the Elephant Ear.  So, no, this one is not deep fried, will most likely not burn your tongue off, and does not come in proportions the size of your head.  It is, however, a sweet little homage to the warm summer nights and the flashing lights of carnivals everywhere.  Enjoy!


Cinnamon Sugar Puff Pastry Triangles
  • 1/2 sheet puff pastry, thawed
  • 1 egg
  • 1 T milk
  • 2 t cinnamon
  • 1/3 C sugar 
  1. Preheat oven to 350℉.
  2. Cut pastry with pizza cutter into 6 triangles.  Place on parchment paper lined jelly roll pan.  Beat egg lightly and mix in milk.  Brush egg mixture over triangles.
  3. Stir together sugar and cinnamon and sprinkle over pastry.
  4. Bake for 10 minutes or until golden.
For an extra treat, try with some vanilla ice cream and caramel sauce in a martini glass!


Print this recipe here.

Monday, July 30, 2012

Fun and decorative way to store Dry Goods!

If your low on cupboard space try storing your dry goods in either Mason Jars or decorative jars on your counter top.  Not only is it functional, but it looks great too.  This also allows you to see in an instant what you have and what you need. 

Thursday, July 26, 2012

Vanilla Ice Cream Versatility

In the summer, having ice cream "stocked" goes without saying.  Some might say it is plain and boring, however, vanilla ice cream, in its simplicity, can be perfect.  Add a few modifications, and it can be extraordinary.  Having it around all the time, can be the perfect dessert solution for drop in guests.  Let's all scream for Vanilla Ice Cream!


Here are two recipes that are simple and delicious, and then take a look below for some great options that need no recipes at all.


Coffee Ice Cream

Serves 4


  • 1 C Coffee, brewed 
  • 2 C Vanilla Ice Cream, softened


  1. In a saucepan, bring Coffee to a boil.  Boil for 15 minutes to reduce to 1/4 C.  Let cool.
  2. Mix Coffee with Ice Cream.
  3. Refreeze if necessary.
Click here to print recipe.


Almond Ice Cream (Pistachio)
Serves 4

  •  2 C Vanilla Ice Cream, softened
  • 1/4 t Almond Extract
  • 1/4 C Almonds, chopped
  • Green Food Coloring (optional) 


  1. Mix together ingredients well.
  2. Refreeze if necessary.
Click here to print recipe.


Other ideas for Vanilla Ice Cream
  • Anything a la mode!
  • Ice cream sandwiches.  (Great with leftover graham crackers from S'mores or chocolate chip cookies.)
  • Over warm brownies, bread pudding, or fruit crisps...yum!
  • Milkshakes
  • In martini glasses with homemade caramel sauce and cinnamon sugar puff pastry triangles
  • Check out our recipe next week for a delicious vanilla ice cream terrine!


Tuesday, July 24, 2012

Pantry Organization Tips!

Need to get your pantry organized?  Here are a few tips to help you make a plan and get started.


1.  Utilize door and floor space when possible.  The inside of your pantry door and under your bottom shelf both are great extra storage.  Over the door hangers and plastic bins make easy additional storage.

2.  Store like things together.  Try to categorize your items and then store them together.  Then when your looking for something you will always know where to look for it.

3.  Check expiration dates!  If the item has expired, then get rid of it.  Storage space in your pantry is limited and you don't want to clutter it with items your not going to use.

The hardest part is getting started, so roll up those sleeves and jump right in.  You will feel great when it's completed.  Good luck!


Thursday, July 12, 2012

Olive Tapenade

The great olive debate.  There is absolutely no middle ground, that I have found, when discussing olives.  They are either something you love or hate.  I happen to LOVE olives, always have.  I was that weird kid though that thought spinach was delicious and could have eaten beets right out of the can.  That being said, I love this olive dip.  I think this is delicious, and especially love that something with this depth of flavor can be made from items right off of the Stocked list.  I love this recipe, also, because it was a tricky one to come up with.  I was struggling to find a substitute for capers off of the Stocked list.  One day I was watching Lidia's Italian on PBS, and she mentioned that capers had an almondy flavor to them.  The rest is history.  I hope you olive lovers enjoy, and I challenge the non-olive population to give it a try.  It just might surprise you!


  • 1/4 C almonds
  • 2 T lemon juice
  • 1 C pitted green or kalamata olives
  • 1 T Worcestershire sauce
  • 1/4 C olive oil
  • 1 T herbes de Provence
  • 1/4 t pepper
  1. In a food processor, combine all the ingredients and pulse until a paste forms.
  2. Serve with crackers, carrot sticks, pita chips, or as a pizza sauce.

Click here to print the recipe!

Tuesday, July 10, 2012

Too many kitchen gadgets?


So we all at one point have been invited to a home shopping party or browsed a kitchen shop where we purchased a kitchen item, tool, or gadget that we absolutely MUST HAVE for our kitchen.  You know what I'm talking about...the crinkle cutter to make your veggies look pretty or the magic egg slicer so you will make that egg salad for lunch instead of eating out.

These items seem like a great purchase at the time, but are you really using them or are they just taking up your very limited kitchen storage space?  The real trick to keeping your kitchen organized and making sure you have enough space is to ONLY buy those kitchen items that you really need an love.  As far as the ones you already have...if you have haven't used it a while than maybe you should think twice about keeping them.

So if it's very important for your veggies to be cut "pretty"  then go ahead and make that purchase...otherwise...just say no!

Tuesday, July 3, 2012

Best place to store plastic wrap!

Store plastic bags, aluminum foil, and plastic wrapping together in a drawer near the refrigerator to make quick work of putting those delicious "Stock" leftovers away!

Thursday, June 28, 2012

Kitchen Tool Favorites

Obviously we love a stocked pantry, fridge, and freezer!  What we also love though is having the right kitchen tools on hand to make our "Stocked" recipes.  When I've been out at cooking demos, every once in awhile I am asked about a kitchen tool I am using, so I though I would list a few that I can't live without.


This is such an effective way to get juice out of citrus fruits.  It is easy to store and very easy to clean!  Best of all, at $3.95, it is super affordable.

Fine mesh strainers like this one are so amazingly useful in the kitchen.  I use mine for everything from sifting together dry baking ingredients to rinsing and draining beans.  I really like the ones that have a larger lip on the opposite end of the handle so that it can sit on top of a bowl.  Also, I prefer plastic over wooden, because it is cheaper and dishwasher safe.  This is a OXO brand, which has proved to me to be a reasonably priced quality brand.  This strainer runs $16.79 at Target.com.


This is a great tool to have in your toolbox.  The Microplane is perfect for zesting citrus, grating whole nutmeg and chocolate, and mincing garlic and onions.  It is one of those tools that you didn't know you needed it until you have it, but with its reasonable price, it is worth the purchase.  This Mircroplane runs $14.95.


Monday, June 25, 2012

Kitchen knife storage!

I bet you have quite a few prep knives in your kitchen. Ever wonder why they get blunt quite quickly? Because you’re storing them loose in a drawer.

To get the longest life out of your knives and to keep them organized try a magnetic knife rack. Mount it in a convenient location in your food preparation area to free up countertop or drawer space. Make sure it is out of reach of children and store knives with their blades pointing down. Magnetic racks will also hold your kitchen scissors.

This 20″ stainless steel holder by MIU is the perfect example and costs under $30.

Friday, June 22, 2012

Mac and Cheese Muffins

My sister-in-law made these for my sweet little niece's 1st birthday!  Happy Birthday Viv!  They were yummy, super fun, and perfect for a more picnicy version of this All-American classic.  Enjoy!


  • 1/3 C bread crumbs
  • 1/4 C parmesan cheese
  • 1 T olive oil
  • 1/4 t salt
  • 2 C uncooked egg noodles or penne pasta
  • 1 egg
  • 3/4 C sour cream or plain yogurt
  • 1 T unsalted butter
  • 1/4 C milk
  • 1 t salt
  • black pepper, to taste
  • 2 1/2 C shredded cheddar cheese
  1. Preheat the oven to 350 degrees F. Grease a (12) muffin tin with nonstick cooking spray. In a small bowl, stir together the bread crumbs, parmesan, olive oil and salt; set aside.
  2. Bring a large pot of lightly salted water to a boil. Add the noodles/pasta and cook so that the noodles/pasta are still a little bit firm. Remove from the heat, drain and return to the pan; stir in the butter and egg until pasta is evenly coated. Stir the Cheddar cheese, sour cream/yogurt, and milk into the pasta. Spoon into the prepared muffin tin. Sprinkle the bread crumb mixture over the tops.
  3. Bake for 30 minutes in the preheated oven, or until the topping is nicely browned. Allow the muffins to cool for a few minutes before removing from the pan, to let the cheese set and hold their muffin shape.
Click here to print recipe.

Thursday, June 14, 2012

The Best Chocolate Chip Cookies!

These cookies are SO unbelievably good!  I have made them a few times and everyone has gone crazy.  I do think that making them big adds to the effect!  I found this recipe on Debbie Koenig's blog, and I highly recommend!  Thanks Debbie!


  • 1 1/2 cups all-purpose flour
  • 1/2 teaspoon baking soda
  • 1/2 teaspoon salt
  • 1/2 cup (1 stick) cold unsalted butter, cut into 1/2-inch pieces
  • 3/4 cup tightly packed light brown sugar
  • 1/2 cup granulated sugar
  • 1 1/2 teaspoons vanilla extract
  • 1 large egg, at room temperature, lightly beaten
  • 6 to 7 ounces bittersweet chocolate chunks (one generous cup; it’s fine to just use half a 12-oz bag)


  1. Using a stand mixer fitted with a paddle attachment or a hand mixer, cream the butter and sugars on low speed until it is smooth and lump free, about 3 minutes. Stop the mixer and scrape down the sides of the bowl and the paddle.
  2. Add the vanilla and egg and beat on low speed for 15 seconds, or until fully incorporated. Do not overbeat. Stop the machine and scrape down the sides of the bowl and the paddle.
  3. Sift together the flour, baking soda, and salt into the bowl.
  4. On low speed, add the flour mixture. Beat until just incorporated. Scrape down the sides of the bowl. Add the chocolate chunks and mix until they are just incorporated. If using a hand mixer, use a wooden spoon to stir them in. Refrigerate dough for at least an hour, and preferably 24-36 hours.
  5. Preheat oven to 350°F. Adjust racks to lower and upper thirds of the oven. Line two baking sheets with parchment paper. Spoon the dough, using an ice cream scooper, 2 inches apart onto the prepared baking sheets.
  6. Bake for 11-13 minutes or until golden brown around the edges but still soft, almost underdone-looking, in the center. To ensure even baking, turn the sheets front to back and switch racks halfway through.
  7. Remove the sheets from the oven.  When cookies are set, remove them to a cooling rack. Wait at least 5 minutes before serving or 20 minutes before storing in an airtight container for up to 3 days at room temperature.
Click here to print the recipe.


I use my KitchenAid about 2-3 times a week.  I love it.  The key to a machine like this, though, is to have it on your countertop all the time.  If you don't have the space, don't bother.  It is just too heavy to pull it out and put it away all the time!


I love this simple strainer that I use to sift in the dry ingredients.  In expensive, and also perfect for draining canned goods, like beans, crab meat, and corn!


I am obsessed with these chocolate chips.  I love me some dark chocolate, and it makes these cookies taste just a bit more sophisticated!

The spatula part was not cutting it, so I started stirring with the handle.

Refrigeration time.  I tested these by baking after 1 hour, and although delicious, the closer you get to 24 hours the better they get.

One of these didn't even make it to picture time!  Enjoy!